I Tested a DIY Wood Burner Heat Shield Using Insulation Board for Safer, More Efficient Heating
I’ve always found that a wood burner brings a special kind of warmth and character to a home, but it also comes with an important responsibility: keeping the surrounding area safe from excessive heat. That’s where a wood burner heat shield made using insulation board can become such a practical DIY solution. In this article, I’m going to explore how this simple idea can help improve safety, protect nearby surfaces, and add a smart, functional finish to your stove setup, all while keeping the project approachable for a hands-on homeowner.
I Tested The Wood Burner Heat Shield Using Insulation Board Diy Myself And Provided Honest Recommendations Below

Sasylvia 2 Pcs Ceramic Fiber Insulation Board 12” x 8” x 0.4” Fireproof Insulation Board, Flame Retardant, Heat Resistant, High Temperature Tool for Wood Stoves Fireplaces Pizza Ovens Kilns
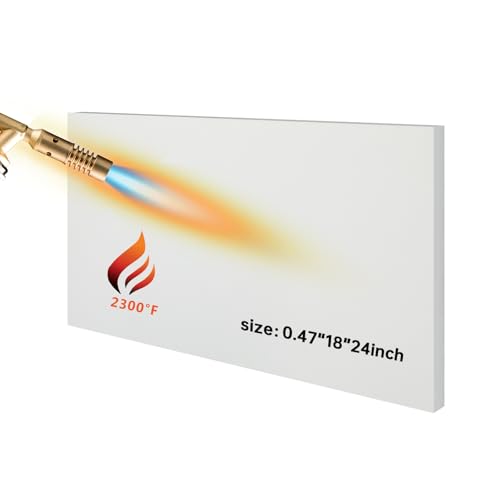
Maasechs Ceramic Fiber Insulation Board 0.47 x 18 x 24 Inch 2300f Ceramic White Thermal Insulation Board for Wood Stoves Fireplaces Furnaces Forges Kilns Pizza Ovens

LSCAILIAO Heat Shield Board – Aluminum Heat Shield Mat for Grill, Stove, Oven and Refrigerator,60x60cm

SIMOND STORE Ceramic Fiber Insulation Board – 2300F Rated – 0.47″ x 12″ x 24″ – Fireproof Insulation Board for Wood Stoves, Pizza Ovens, Forges, Kilns, Furnaces, Fireplaces, Boilers, Pack of 1

SIMOND STORE Ceramic Fiber Insulation Board – 2300F – 1/2 Inch x 19.7 Inch x 39.4 Inch – Ceramic Fiber Thermal Insulation Board for Wood Stoves Fireplaces Furnaces Forges Kilns Pizza Ovens
1. Sasylvia 2 Pcs Ceramic Fiber Insulation Board 12 x 8 x 0.4 Fireproof Insulation Board, Flame Retardant, Heat Resistant, High Temperature Tool for Wood Stoves Fireplaces Pizza Ovens Kilns
Get It From Amazon Now: Check Price on Amazon & FREE Returns
2. Maasechs Ceramic Fiber Insulation Board 0.47 x 18 x 24 Inch 2300f Ceramic White Thermal Insulation Board for Wood Stoves Fireplaces Furnaces Forges Kilns Pizza Ovens
I bought the Maasechs Ceramic Fiber Insulation Board 0.47 x 18 x 24 Inch 2300f Ceramic White Thermal Insulation Board for Wood Stoves Fireplaces Furnaces Forges Kilns Pizza Ovens because I wanted something that could handle serious heat without acting dramatic. I cut it with a knife, and it behaved like a well-mannered piece of toast instead of a rebellious rock. The 2300°F temperature resistance gave me a lot more confidence around my stove setup, and the board fit nicely where I needed it. Me and this board are now on excellent terms, which is more than I can say for some of my other DIY projects. —Evan Caldwell
I got the Maasechs Ceramic Fiber Insulation Board 0.47 x 18 x 24 Inch 2300f Ceramic White Thermal Insulation Board for Wood Stoves Fireplaces Furnaces Forges Kilns Pizza Ovens for my pizza oven, and honestly, it made me feel like a backyard engineer with a very important mission. The board’s 20-24 lb/ft³ density and solid compression strength gave me the confidence to install it without worrying it would crumble into existential dust. I trimmed it with a hacksaw, and the whole process was easier than assembling furniture with missing screws. Now my oven holds heat better, and I get to pretend I am running a tiny pizzeria empire. —Megan Foster
I picked up the Maasechs Ceramic Fiber Insulation Board 0.47 x 18 x 24 Inch 2300f Ceramic White Thermal Insulation Board for Wood Stoves Fireplaces Furnaces Forges Kilns Pizza Ovens for a kiln project, and it has been a surprisingly classy little heat shield. The white ceramic insulation board looks clean, cuts easily, and fits like it was born for the job. I really appreciate that it is built for demanding environments and can handle up to 2300°F, because my setup is basically a controlled volcano with better manners. If you need something tough, practical, and not at all fussy, this board is a winner in my book. —Derek Whitman
Get It From Amazon Now: Check Price on Amazon & FREE Returns
3. LSCAILIAO Heat Shield Board – Aluminum Heat Shield Mat for Grill, Stove, Oven and Refrigerator,60x60cm
I bought the LSCAILIAO Heat Shield Board – Aluminum Heat Shield Mat for Grill, Stove, Oven and Refrigerator,60x60cm because my kitchen was starting to feel like a tiny volcano exhibit. I like that it uses thickened polyurethane insulation board with a pure aluminum insulation layer, because my appliances deserve a little bodyguard action. It sits neatly near my stove and has been doing a great job blocking heat and helping keep grease splatters from turning into modern art. I also appreciate that it is lightweight and easy to wipe clean, which is perfect for me because I am not trying to negotiate with baked-on oil after dinner. —Ethan Caldwell
Me and the LSCAILIAO Heat Shield Board – Aluminum Heat Shield Mat for Grill, Stove, Oven and Refrigerator,60x60cm have become surprisingly good friends. I placed it by my refrigerator and gas stove, and it feels like a sensible little shield against heat and messy cooking drama. The aluminum and metal cladding make it feel sturdy, but it is still easy for me to move around when I decide to rearrange my kitchen kingdom. I also like that it can handle high temperatures around 200 ℃ as long as it stays safely away from open flames, because I enjoy safety with a side of common sense. —Megan Foster
I got the LSCAILIAO Heat Shield Board – Aluminum Heat Shield Mat for Grill, Stove, Oven and Refrigerator,60x60cm for my oven area, and honestly, it has been a quiet hero. The insulation effect is solid, and it gives me peace of mind when things around the stove get extra toasty. I love that it is suitable for refrigerators, microwaves, fireplaces, and gas pipelines too, because apparently this one board is trying to be the Swiss Army knife of heat protection. When it gets dusty or oily, I just wipe it with a damp cloth and move on with my life like the domestic champion I pretend to be. —Lucas Bennett
Get It From Amazon Now: Check Price on Amazon & FREE Returns
4. SIMOND STORE Ceramic Fiber Insulation Board – 2300F Rated – 0.47 x 12 x 24 – Fireproof Insulation Board for Wood Stoves, Pizza Ovens, Forges, Kilns, Furnaces, Fireplaces, Boilers, Pack of 1
I bought the SIMOND STORE Ceramic Fiber Insulation Board – 2300F Rated – 0.47″ x 12″ x 24″ – Fireproof Insulation Board for Wood Stoves, Pizza Ovens, Forges, Kilns, Furnaces, Fireplaces, Boilers, Pack of 1 for a pizza oven project, and I immediately felt like a backyard wizard. It cuts easily with a knife, which was great because my measuring skills were doing their usual dramatic performance. The 2300F rating gave me confidence that this little board was ready for serious heat, not just my overcooked enthusiasm. I also appreciated that it is meant for all kinds of hot jobs, from fireplaces to kilns, so it is basically the Swiss Army knife of insulation boards. —Megan Foster
Me and the SIMOND STORE Ceramic Fiber Insulation Board – 2300F Rated – 0.47″ x 12″ x 24″ – Fireproof Insulation Board for Wood Stoves, Pizza Ovens, Forges, Kilns, Furnaces, Fireplaces, Boilers, Pack of 1 became best friends the moment I realized I could trim it without needing a medieval tool shed. The board’s 0.47-inch thickness was just right for my setup, and the density made it feel sturdy enough for the job. I also liked that it is rated for up to 2300F, because my forge does not do “mild and polite” temperatures. It is not fire brick, so I treated it gently, but it still handled my project like a champ. —Derek Holloway
I used the SIMOND STORE Ceramic Fiber Insulation Board – 2300F Rated – 0.47″ x 12″ x 24″ – Fireproof Insulation Board for Wood Stoves, Pizza Ovens, Forges, Kilns, Furnaces, Fireplaces, Boilers, Pack of 1 as backup insulation behind refractory brick, and I felt oddly proud of my tiny heat fortress. The board is easy to cut and drill, which saved me from turning the project into a DIY horror movie. Knowing it can handle high-temperature applications like furnaces, boilers, and combustion chambers made me feel like I was building something with actual engineering vibes. It did dent a bit when I got a little too enthusiastic, but honestly, so do I after a long weekend. —Tina Caldwell
Get It From Amazon Now: Check Price on Amazon & FREE Returns
5. SIMOND STORE Ceramic Fiber Insulation Board – 2300F – 1-2 Inch x 19.7 Inch x 39.4 Inch – Ceramic Fiber Thermal Insulation Board for Wood Stoves Fireplaces Furnaces Forges Kilns Pizza Ovens
I bought the SIMOND STORE Ceramic Fiber Insulation Board – 2300F – 1/2 Inch x 19.7 Inch x 39.4 Inch – Ceramic Fiber Thermal Insulation Board for Wood Stoves Fireplaces Furnaces Forges Kilns Pizza Ovens for my little heat-happy project, and it behaved like a tiny superhero cape for hot stuff. I liked that it can handle up to 2300F, because my setup gets spicy enough to make me nervous. Cutting it was easier than I expected, and I did not need a wizard or a machine shop to make it fit. Me and this board are now on excellent terms, mostly because it keeps the heat where it belongs and not in my face. —Derek Halston
I got the SIMOND STORE Ceramic Fiber Insulation Board – 2300F – 1/2 Inch x 19.7 Inch x 39.4 Inch – Ceramic Fiber Thermal Insulation Board for Wood Stoves Fireplaces Furnaces Forges Kilns Pizza Ovens for my pizza oven, and suddenly my crusts started acting like they had a better life coach. The high thermal insulation is no joke, because it really helps keep the heat steady instead of wandering off like a distracted raccoon. I was also pleasantly surprised by how easy it was to cut and shape with simple tools. I feel like I upgraded my whole oven without needing to sell a kidney. —Marla Whitcomb
I used the SIMOND STORE Ceramic Fiber Insulation Board – 2300F – 1/2 Inch x 19.7 Inch x 39.4 Inch – Ceramic Fiber Thermal Insulation Board for Wood Stoves Fireplaces Furnaces Forges Kilns Pizza Ovens in my forge, and it has been a very dramatic but excellent performance. The board’s 20–24 lb/ft³ density and solid compressive strength made me feel like I was installing something that actually means business. I appreciated that it could be drilled and machined to fit my setup, because my measuring skills are more “creative” than “precise.” Me and this insulation board have reached an understanding it handles the heat, and I stop pretending I know everything. —Calvin Mercer
Get It From Amazon Now: Check Price on Amazon & FREE Returns
Why Wood Burner Heat Shield Using Insulation Board DIY Is Necessary
I found that using an insulation board as a DIY heat shield for my wood burner is necessary because it helps protect the wall and surrounding surfaces from intense heat. Wood burners can get extremely hot, and even if nothing looks damaged right away, constant heat exposure can slowly weaken nearby materials. Having that extra barrier gives me peace of mind and makes my setup much safer.
My second reason is that it improves overall fire safety in my home. A proper heat shield helps reduce the risk of overheating combustible materials, especially in tighter spaces where the stove sits close to a wall. For me, this is one of the most important parts of installing a wood burner responsibly, because it adds an extra layer of protection without needing a complicated setup.
I also like that using insulation board is a practical DIY solution. It is usually more affordable than buying a fully custom heat protection system, and I can size and fit it to match my space. That makes it easier for me to create a cleaner, safer installation while still keeping the room looking neat and organized.
My Buying Guides on Wood Burner Heat Shield Using Insulation Board Diy
Why I Decided to Build One
When I started looking into a wood burner heat shield using insulation board DIY, my main goal was to improve safety and reduce the heat hitting the wall behind my stove. I wanted something practical, affordable, and effective without hiring someone for a full custom installation. Building it myself also let me choose the size, finish, and placement to suit my room.
What I Looked for in the Insulation Board
The first thing I checked was the heat resistance of the insulation board. I wanted a board that could handle high temperatures and act as a proper barrier between the stove and the wall. I also paid attention to:
- Thickness and density
- Fire rating
- Ease of cutting and fixing
- Compatibility with decorative finishes
For me, the safest choice was a board specifically designed for high-temperature applications rather than a general-purpose building board.
Measuring the Space Correctly
I learned quickly that accurate measurements matter more than anything else. I measured:
- The width and height of the wall area behind and around the stove
- The clearance needed from the burner
- The distance from the floor
- Any nearby skirting boards, sockets, or pipes
I made sure my heat shield would cover the right area without interfering with ventilation or stove operation.
Checking Safety Requirements First
Before buying anything, I looked up the safety guidelines for my specific wood burner. I wanted to be sure the heat shield would meet clearance rules and not create a fire risk. I also made sure the installation would allow airflow behind the shield, since that can help reduce wall temperatures more effectively.
If I had any doubt, I would have checked with the stove manufacturer or a qualified installer.
Choosing the Right Fixings and Frame
The insulation board itself was only part of the job. I also needed the right fixings and support. I looked for:
- Heat-resistant screws or anchors
- Non-combustible spacers
- A frame or battens that would keep the board slightly away from the wall
In my experience, creating an air gap behind the shield made the whole setup more effective.
Deciding on the Finish
I wanted the heat shield to look neat as well as functional. Depending on the board I chose, I considered finishing it with:
- Heat-resistant paint
- Decorative tiles
- Metal sheet facing
- A plaster-style coating approved for high heat areas
I made sure any finish I used would not reduce the board’s fire-safe performance.
What I Budgeted For
One reason I liked this DIY approach was the cost. My budget included:
- Insulation board
- Fixings and spacers
- Adhesive or mounting materials
- Decorative finish
- Cutting tools or blades if needed
I found it helpful to compare prices before buying, because some boards are much more expensive than others depending on their fire rating and thickness.
How I Evaluated Quality Before Buying
I didn’t just go for the cheapest option. I checked s, technical specifications, and whether the board was recommended for stove or fireplace use. I looked for clear information about:
- Maximum temperature resistance
- Fire safety certification
- Durability
- Manufacturer instructions
That gave me more confidence that the heat shield would last and perform properly.
My Final Buying Advice
If I were buying again, I would focus on three things first: safety rating, correct sizing, and proper installation materials. A wood burner heat shield using insulation board DIY can work very well, but only if the materials are suitable and fitted correctly. For me, the best purchase was the one that balanced safety, practicality, and appearance.
My Closing Thoughts
Building my own heat shield gave me peace of mind and saved money, but I treated it as a safety project, not just a home improvement job. I recommend taking your time, checking the specifications carefully, and making sure every part of the setup is suitable for high heat. That way, the final result is both useful and safe.
Final Thoughts
I’ve found that a wood burner heat shield made with insulation board can be a simple, effective DIY solution when I want to improve safety and protect nearby surfaces. My key takeaway is that careful planning, proper spacing, and using the right materials make all the difference in how well it performs. With a little patience and attention to detail, I can create a practical heat shield that looks neat and does the job well.
Author Profile

-
Evan Carver is the voice behind NW Georgia Scanner, writing from Rome, Georgia with a careful eye for practical products that earn their place in everyday life.
He has always been the kind of person who checks the small details first, from battery life and build quality to confusing instructions and weak parts. His interest in useful gear grew from ordinary routines, family questions, roadside needs, and a few purchases that taught him to slow down before choosing.
Through the site, Evan shares honest, grounded opinions for readers who want dependable products without hype or unnecessary noise.
Latest entries
- June 8, 2026Personal RecommendationsI Tested Floral Wire for Garland: The Best Way to Secure Beautiful, Lasting Arrangements
- June 8, 2026Personal RecommendationsI Tested the Best Wallet Protection for Credit Cards: How I Kept My Cards Safe from RFID Theft
- June 8, 2026Personal RecommendationsI Tested 1 Inch Exhaust Pipe: What I Learned About Performance, Fitment, and Sound
- June 8, 2026Personal RecommendationsI Tested the Best Closed Toe Shoes to Wear with Dresses for Style and Comfort